Sigma 50mm F1.4 ART DG HSM Evaluation
July 08, 2022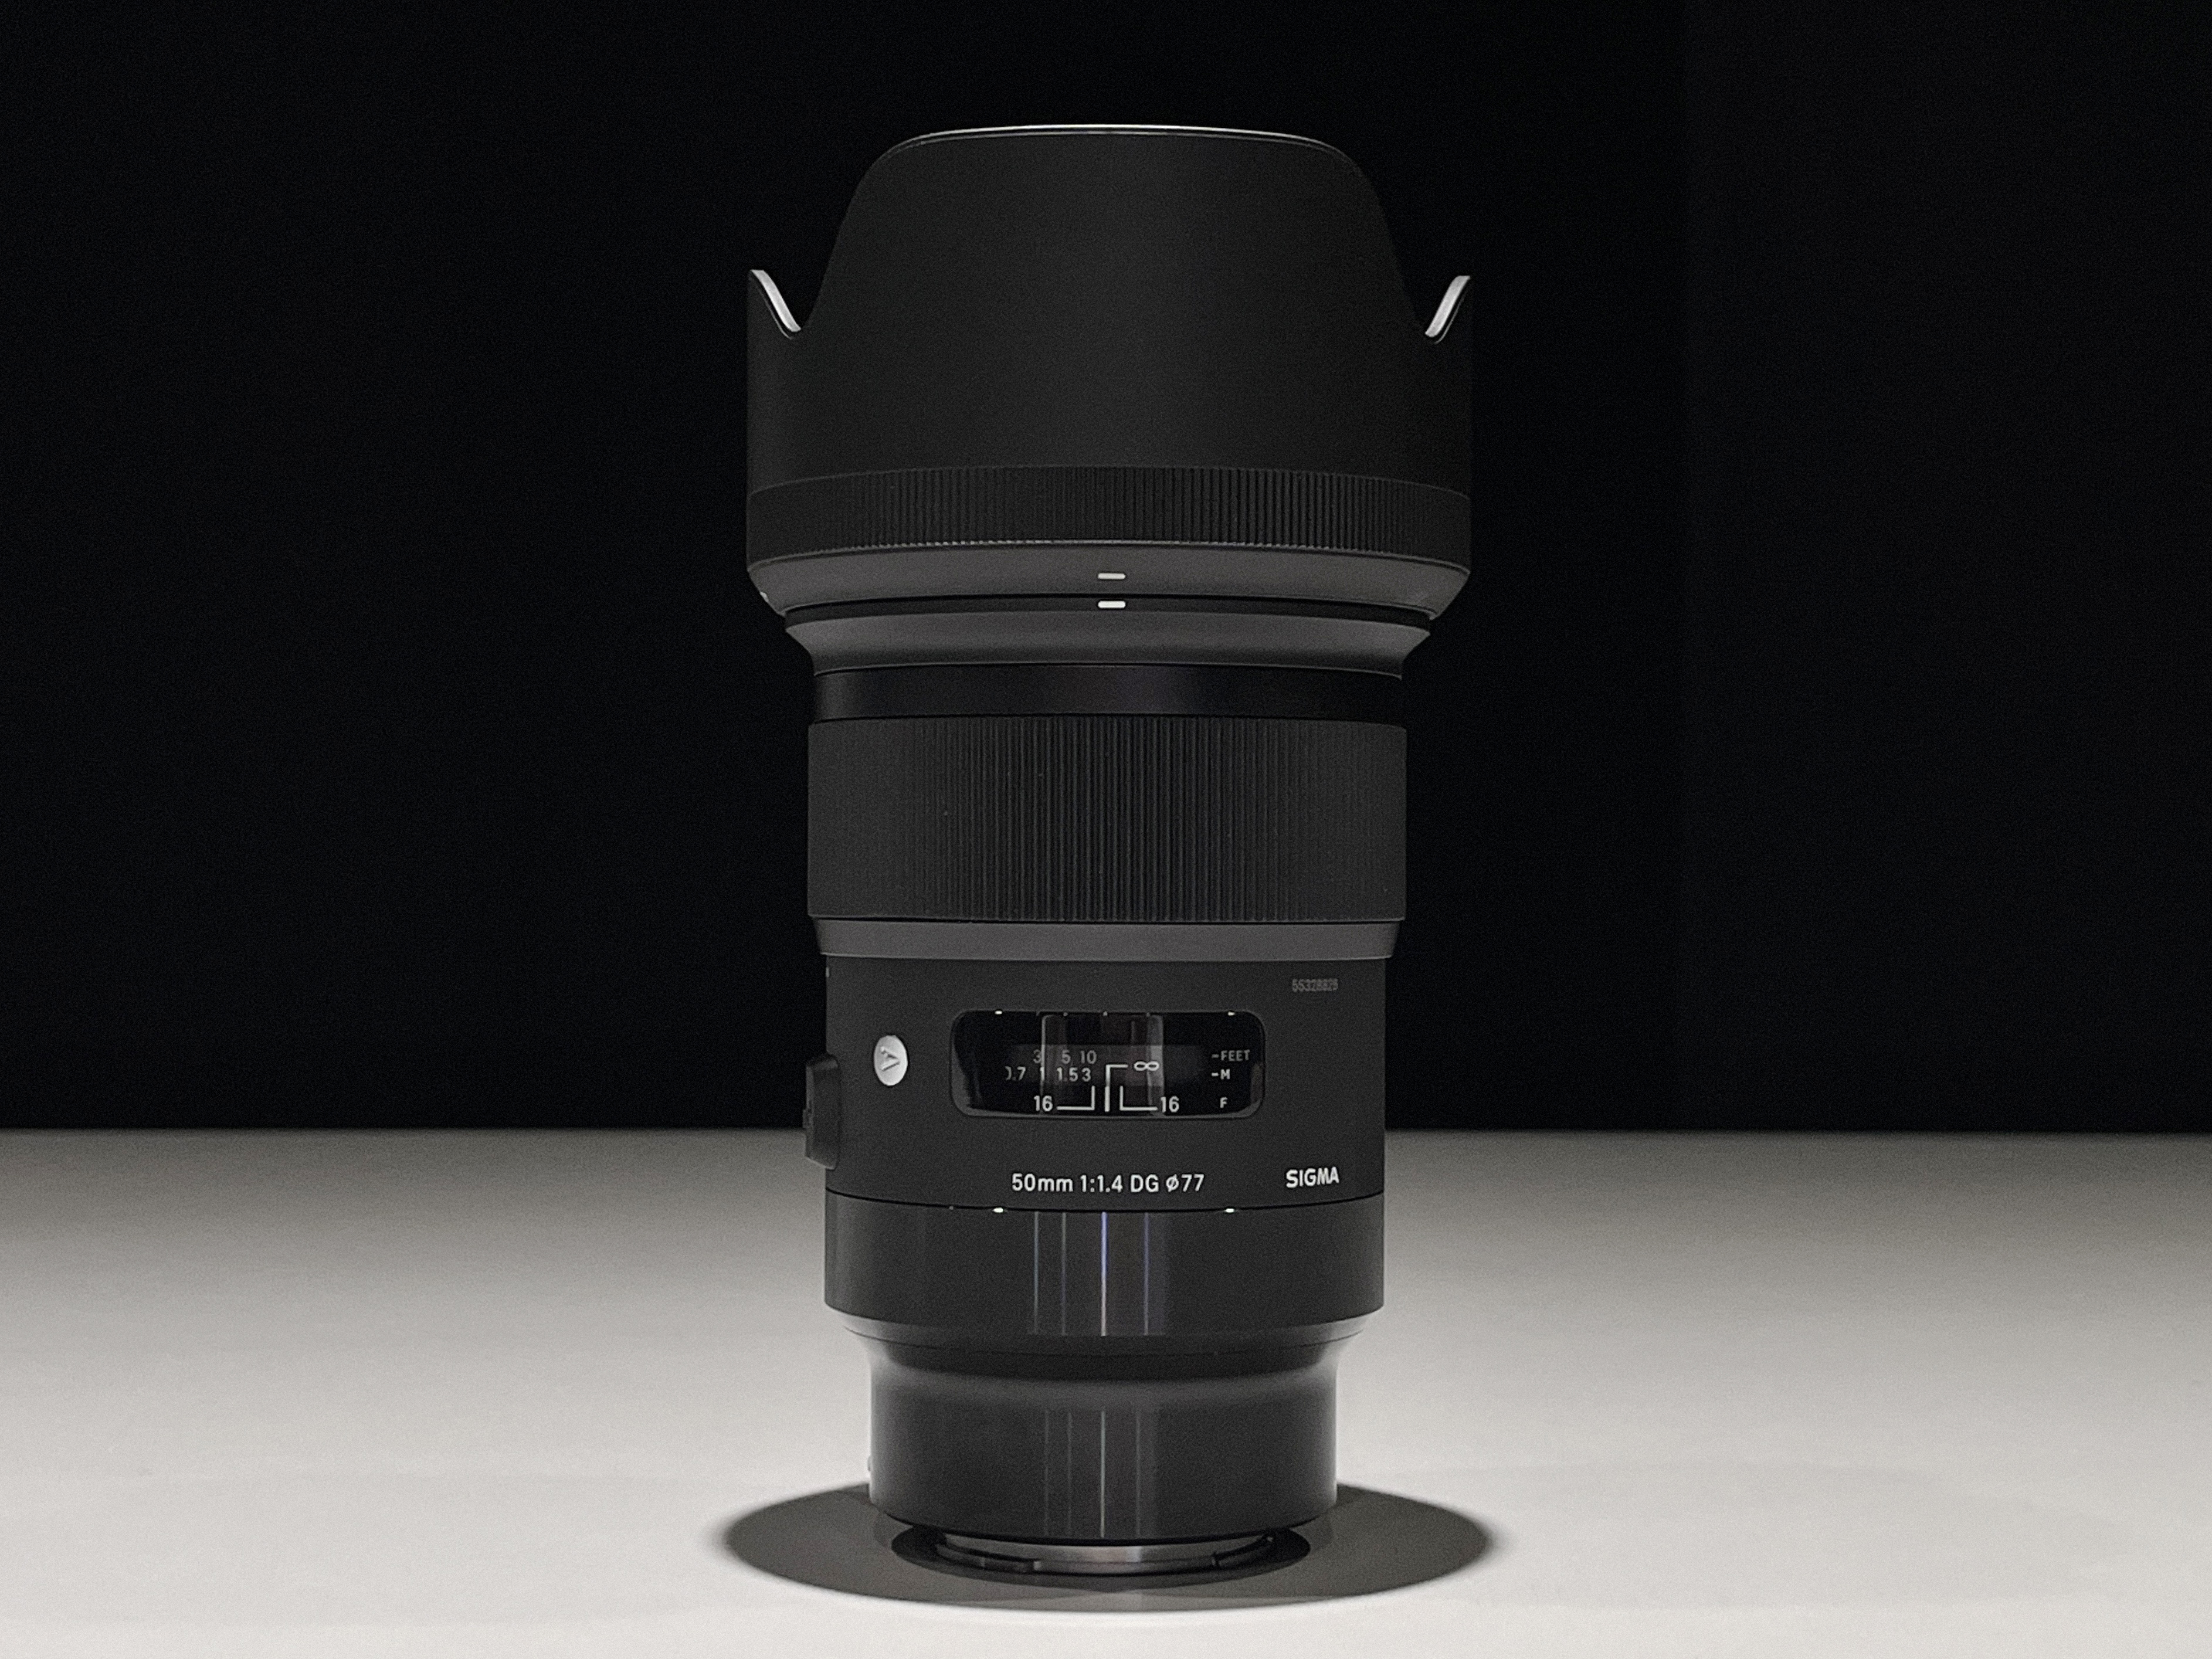
Sigma 50mm f/1.4 DG HSM Art in Sony E-mount.
As a follow up to my review of the Voigtlander 110mm F2.5 APO-Lanthar Macro, I wanted to dedicate space to evaluating the performance of the Sigma 50mm f/1.4 ART lens in an art reproduction environment. As with the Voigtlander, the majority of the Sigma reviews that exist on the internet are Ken Rockwell-adjascent; full of “real world image samples” of puppies, flowers, sunsets, and manufacturers’ MTF charts. How practical for those of us who do production-level imaging!
I’ve spent the last 16 months putting this lens through the wringer, photographing cultural heritage objects of varying shapes and sizes, from correspondance to posters to framed artwork. This review will summarize my experience identifying the optimal working aperture and include target images captured in a controlled environment with as little variables as possible influencing the results.
Overview
The Sigma ART lenses are easy to love. They come in at an affordable price point relative to similarly high-performing lenses from makers like Zeiss and Voigtlander and they are built incredibly well. Most notably, I’m impressed by the “HSM” designation on the Sigma 50mm ART which stands for Hyper Sonic Motor. In my testing, this electronically driven internal focusing mechanism holds the focus point perfectly for extended periods of time, even when the camera and lens are pointed down, fighting gravity on a copy stand. The same can not be said of many other lenses using traditional helicals which have a tendency to drift when pointed down since these moving parts are lubricated to move the elements quickly for autofocus. Even though the Sigma 50 ART is an autofocus lens (with manual override), I’ve found that the Hyper Sonic Motor stays engaged and solidly retains focus.
50mm is an ideal, do-it-all focal length for reprographics. If we think about the Voigtlander 110mm Macro as a fillet knife, perfect for performing a small handful of tasks with extreme quality and precision, the Sigma 50mm ART is a Swiss Army Knife, ready to tackle any task thrown at it with the solid performance expected from any workhorse tool. With an angle of view of 47º and maximum magnification ration of 1:5.6, this lens is perfect for photographing a wide variety of objects, large or small. 50mm is not too wide to introduce signifcant lens distortion or reflections (especially at close focus distances) and is not too long as to require high ceilings or an exceptionally tall copy stand column to photograph larger objects.
Calibration & Testing Environment
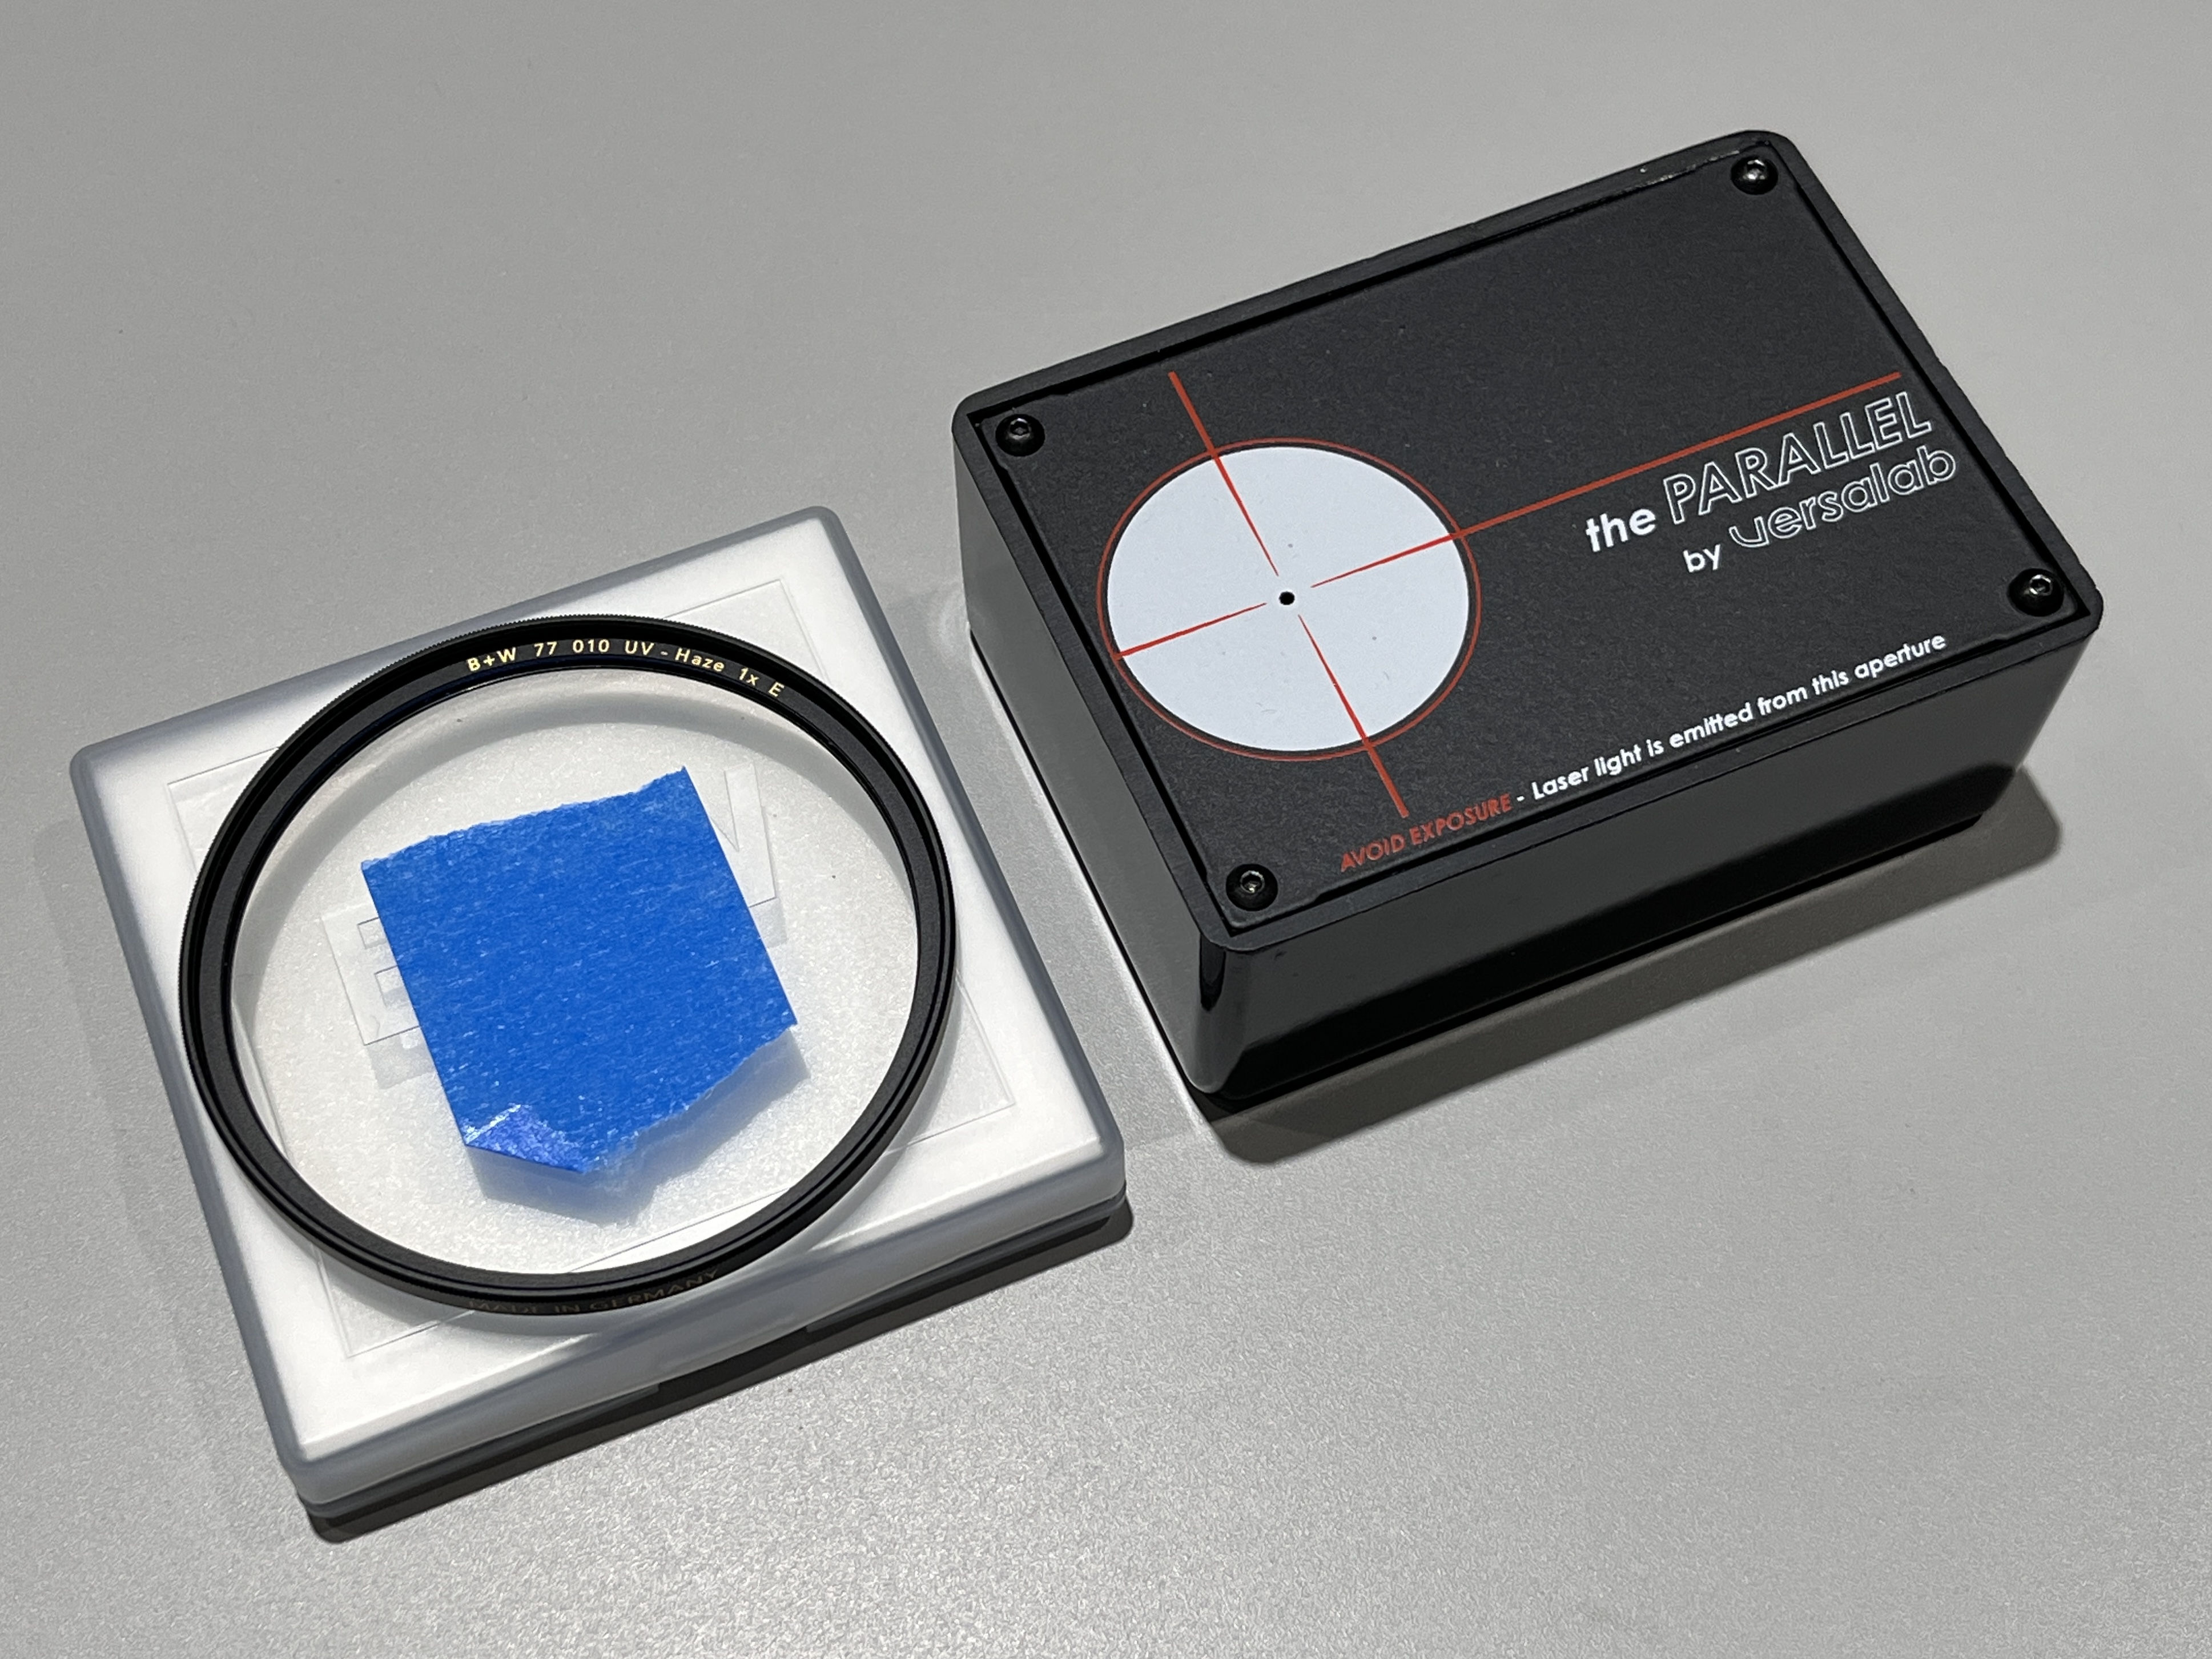
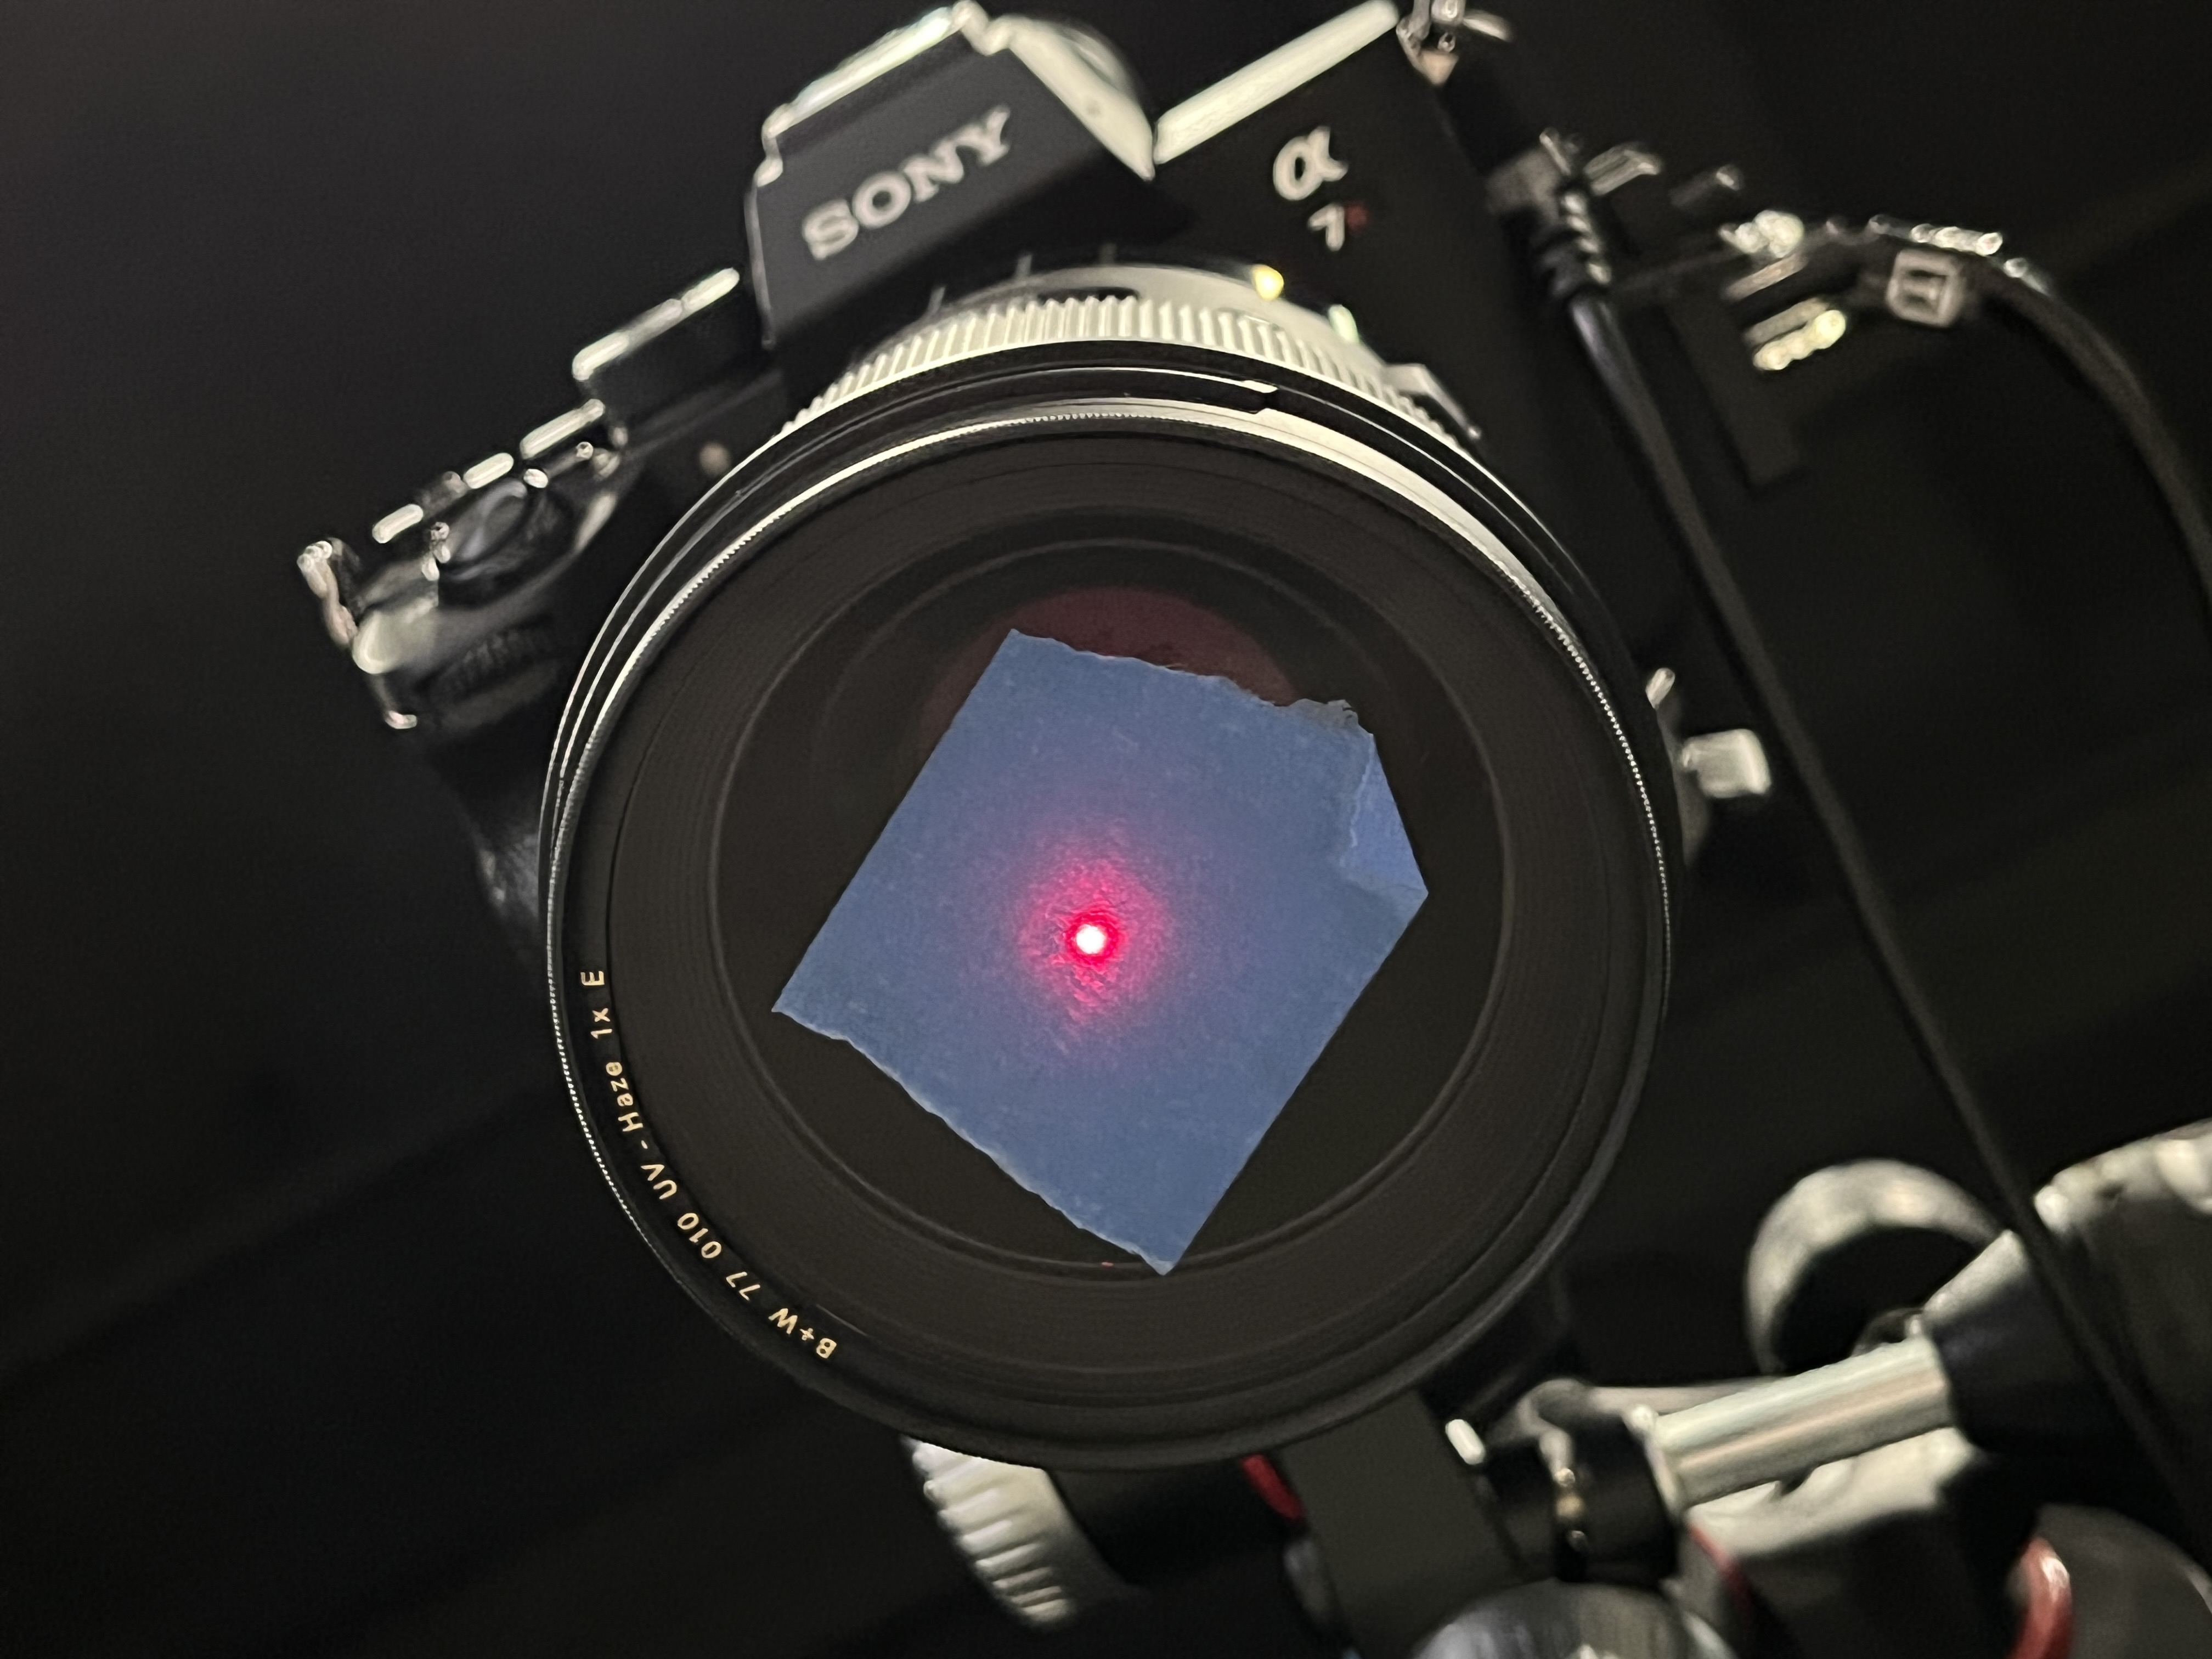
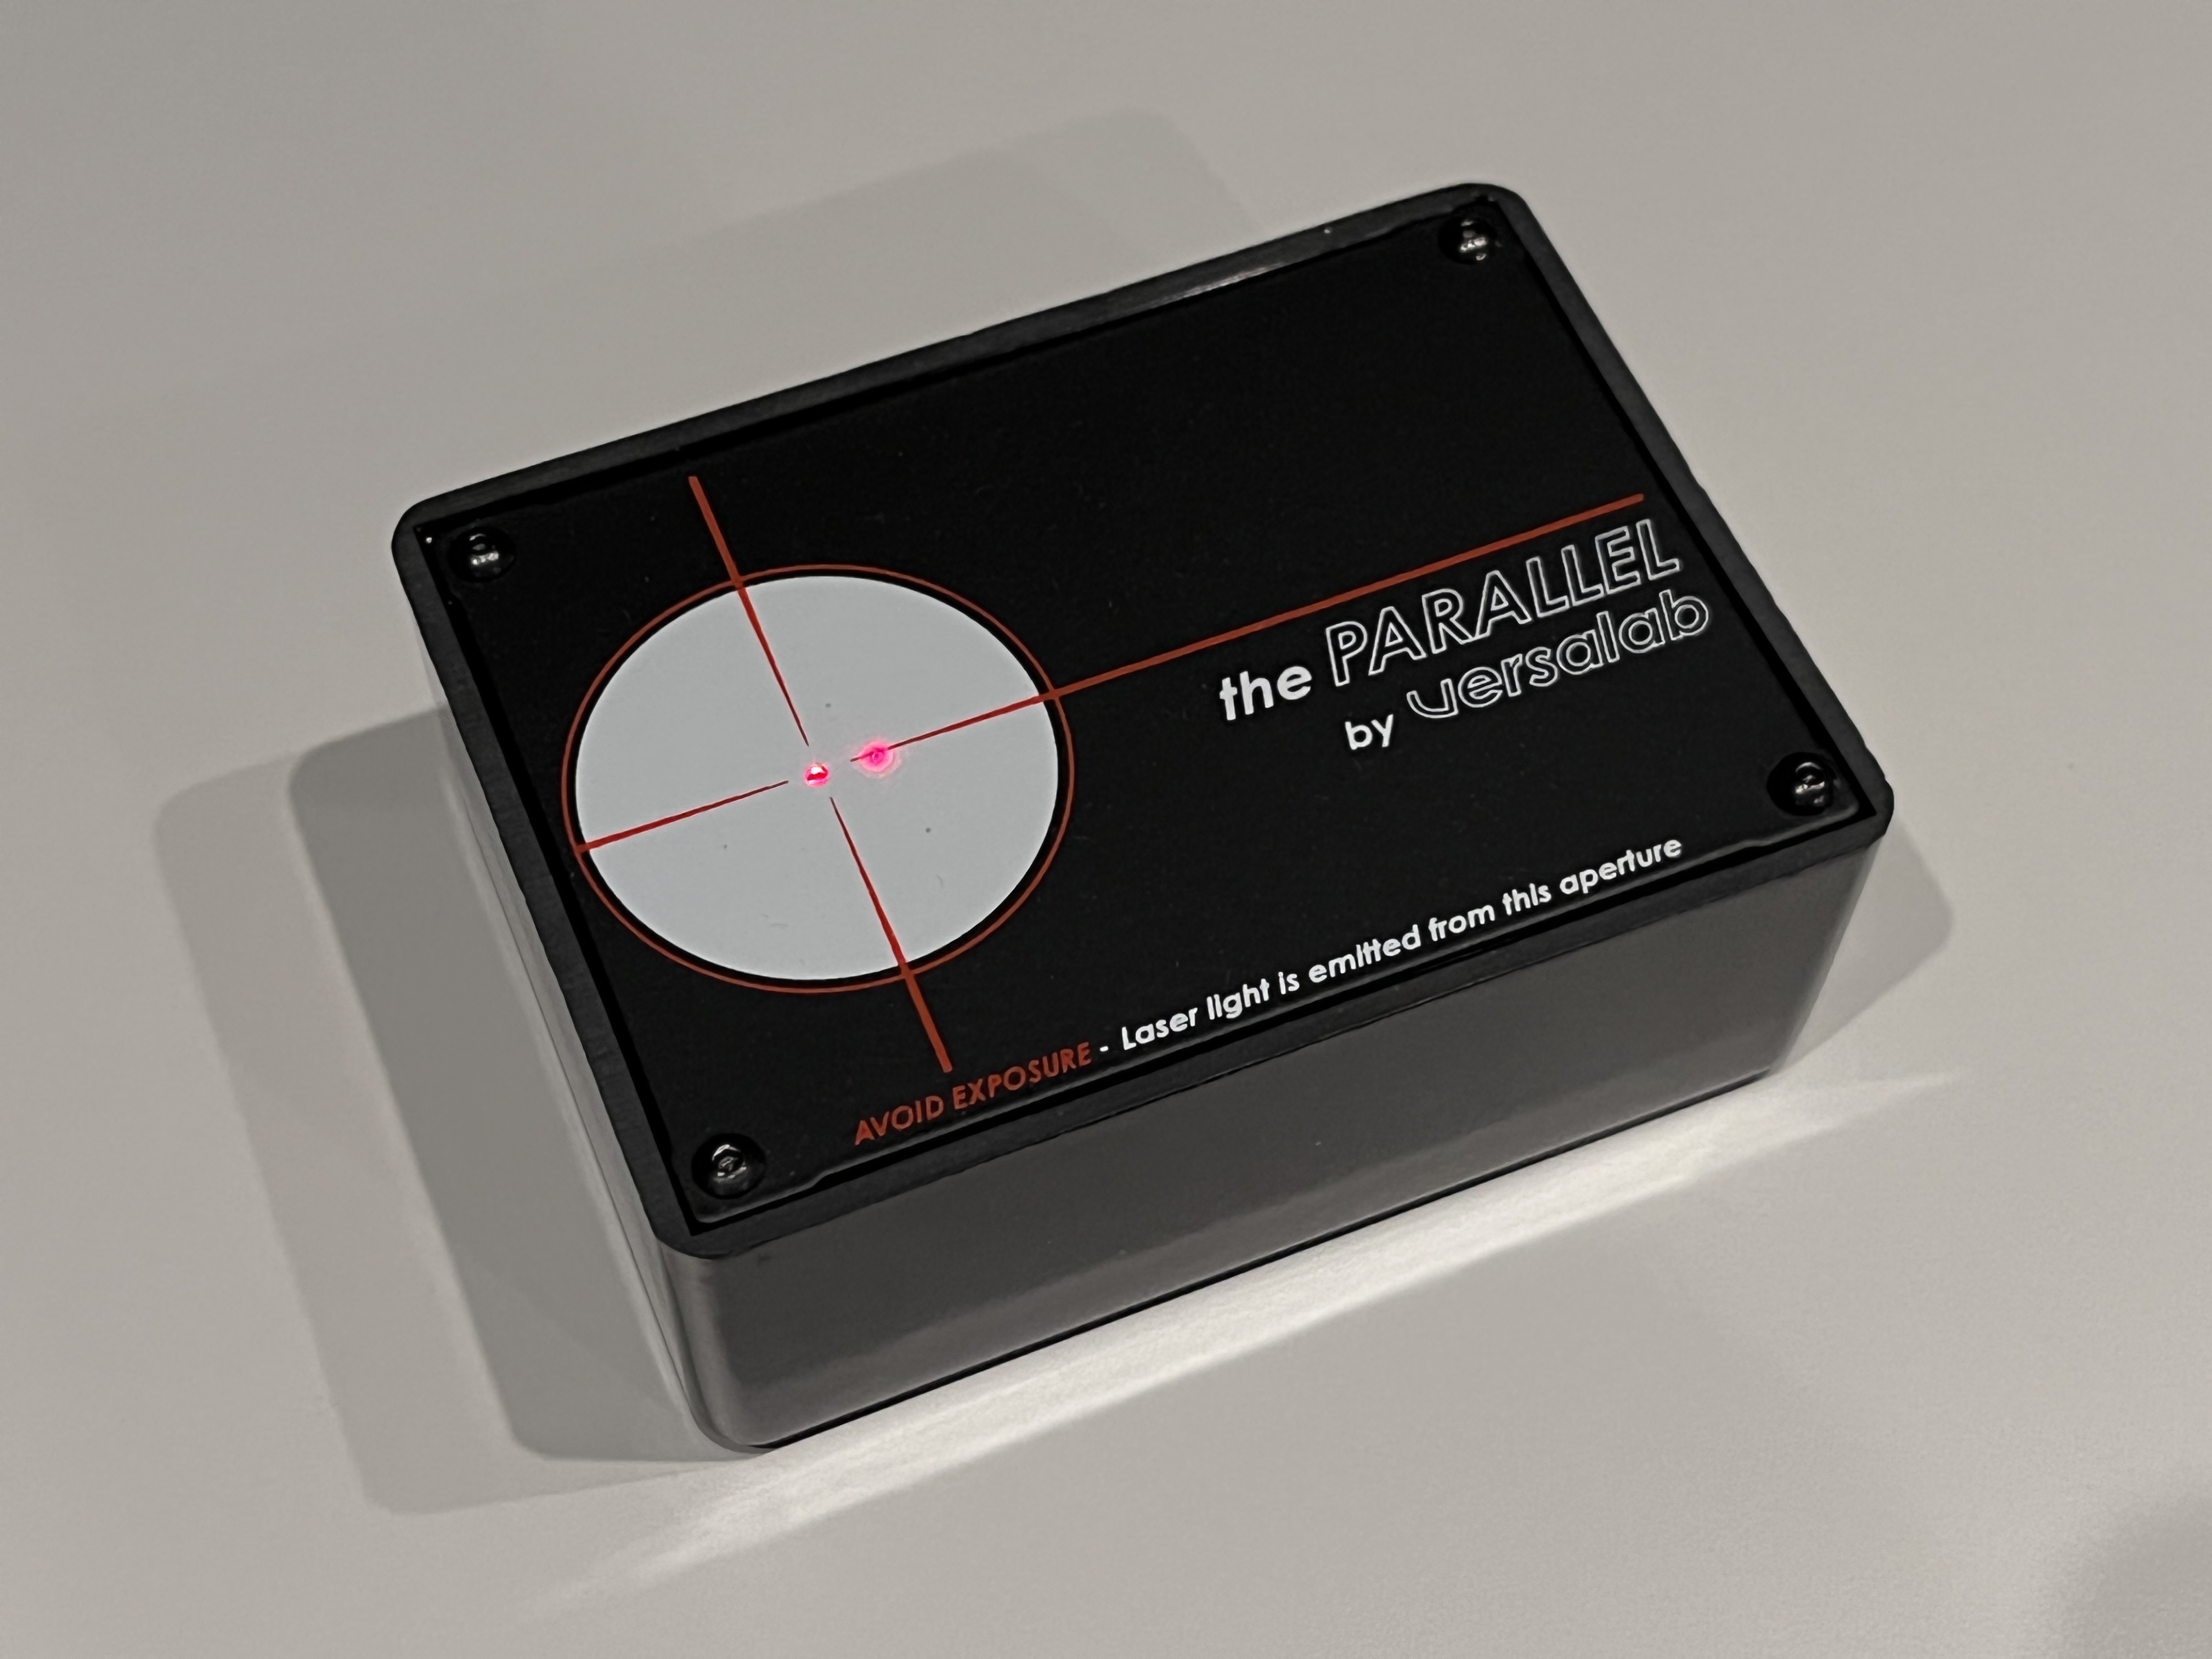
- Camera aligned using a Versalab Parallel laser alignment tool and an UV filter over the lens
- ISO 100 to minimize noise
- Shutter speed was set to max sync speed (1/125) to prevent ambient light contamination
- Profoto D4 pack with Profoto Acute/D4 heads and Chimera strip softboxes.
- Exposure was adjusted by increasing the power on the pack as I transitioned from larger to smaller apertures.
- Lens cast corrections (LCCs) were made at each aperture to correct for vignetting and light falloff
- Capture One analyzed each target image individually for chromatic abberation and made corrections accordingly
- Focus position remained constant throughout the aperture sweep.
- Minimal, but identical sharpening applied to the RAW files in Capture One: Amount = 40, Radius = 1px, Threshold = 0
- Create a custom ICC profile for the sensor/lens/lighting combination
To fairly evaluate the resolving power and flatness of the focus plane, the most important step of the calibration was ensuring parallelism between the camera sensor and the image plane. I placed a Parallel by Versalab beneath the camera on my work surface and fixed a 77mm ø B+W UV filter with a piece of tape on the inside to the front of the lens. Since the laser passes through the UV filter, a backing is necessary so that the laser has something to reflect off of. I prefer to use the B+W filters over a brand like Tiffen (where you can see the glass flop around) because the B+W filters are built well and you can be sure that the glass is parallel to the lens which is ultimately parallel to the sensor.

Target Image Capture
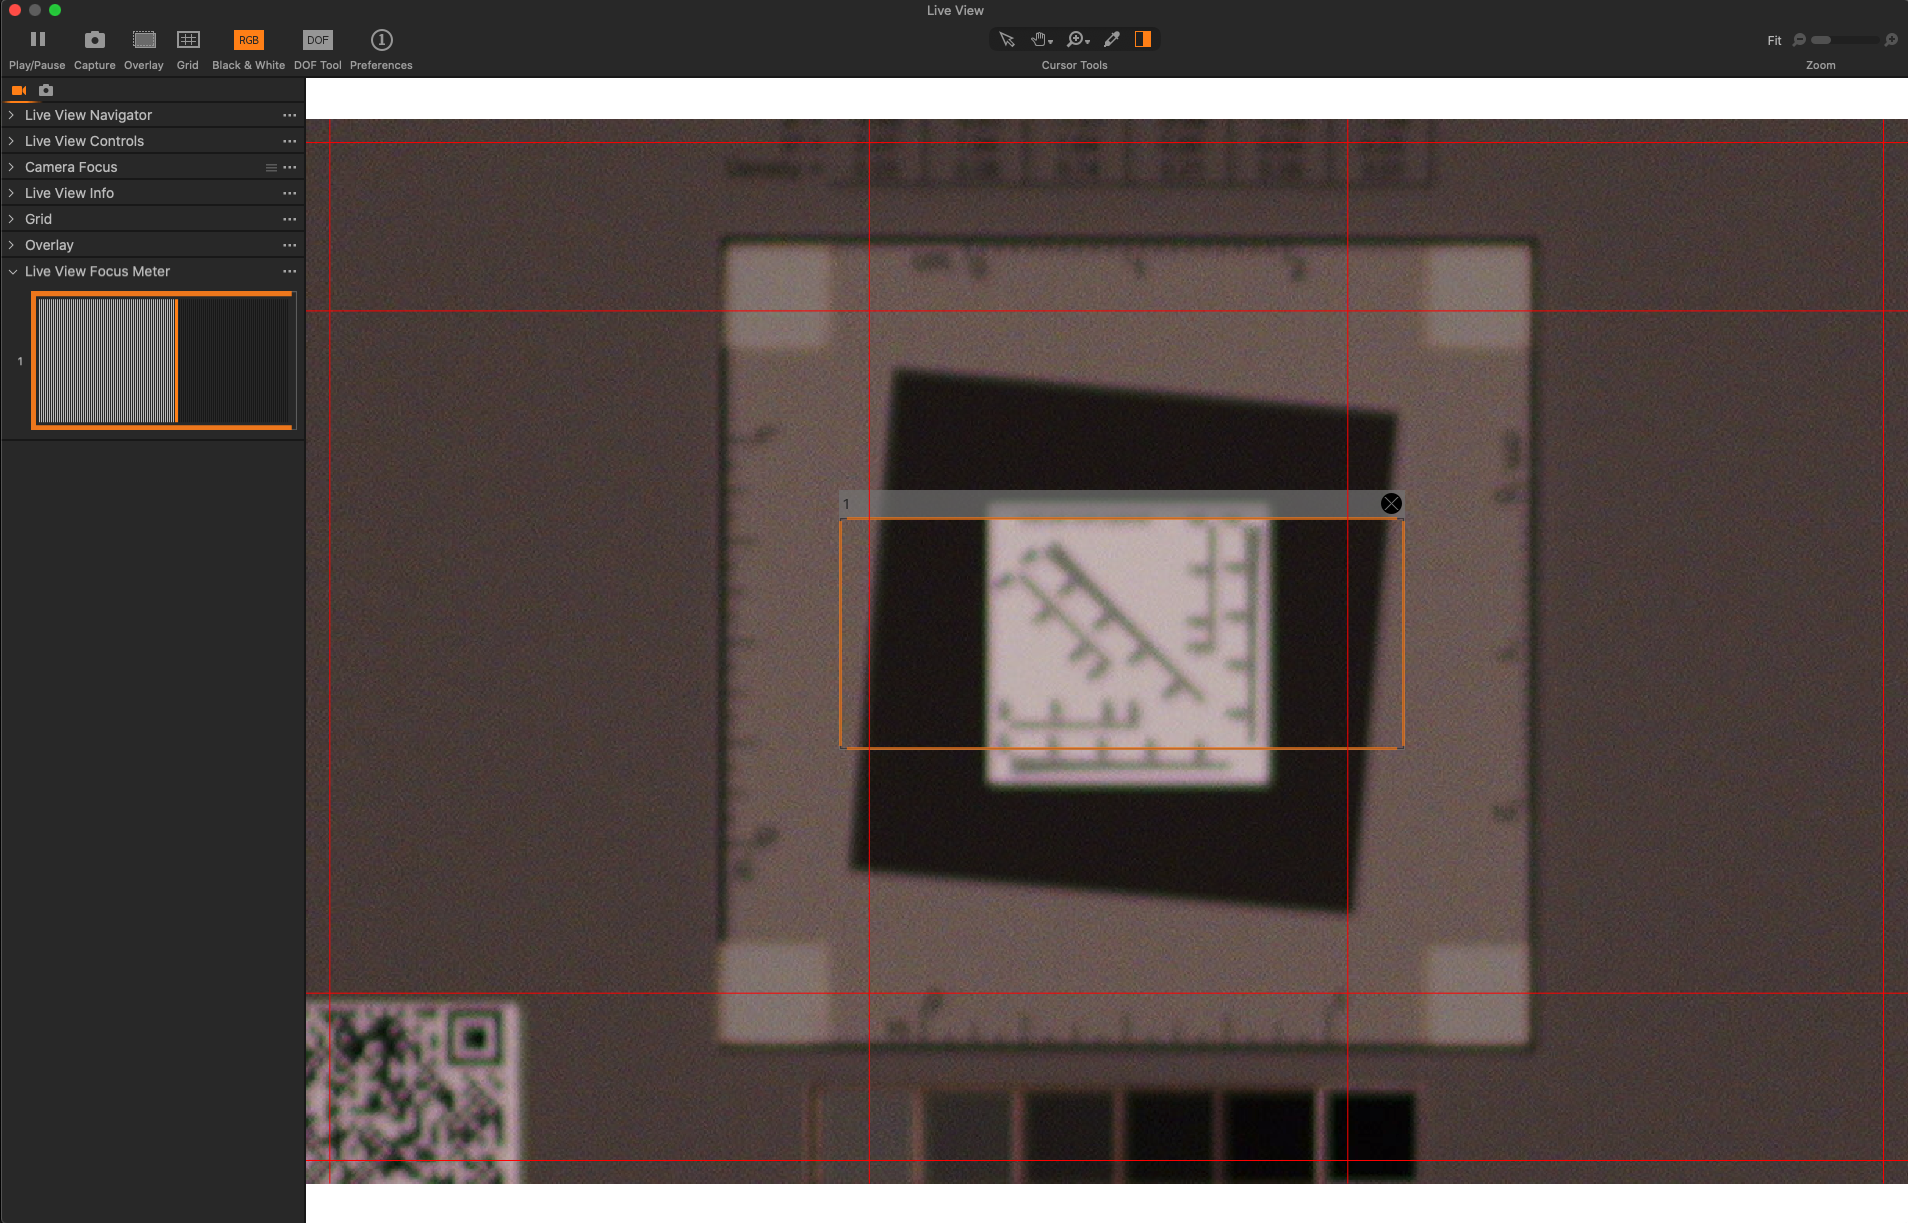
The camera, a Sony A7R IV, was tethered to Capture One 21 and critical focus was achieved by manually focusing the lens in live view with assistance from the Live View Focus Meter.

Once focused, I went about shooting a blank image of the matte grey Formica I use as a background material to create LCCs for each aperture, in 1/3 stop increments, from f/5.6 to f/11. This range was selected as it is the most practical aperture range. Generally, most lenses perform optimally between f/7.1 and f/9; apertures wider than f/5.6 will likely produce soft edges and apertures smaller than f/11 will likely introduce excessive diffraction. All exposure adjustments were made by increasing the flash output of the power pack.

Next, I centered the Device Level Target in the field of view (FoV) and quickly captured an image at each aperture incremement. To evaluate corner sharpness, I registered the target in the upper left and lower right corners of the camera’s FoV and captured an image at each aperture increment. Again, all exposure adjustments were made by increasing the flash output of the power pack. With Capture One’s Next Capture Naming tool, I was able to use tokens fo which pull EXIF data into the filname to automatically update the filename with the working aperture as I shifted through the range.
The naming convention was set up as:
[Lens Token]_[Aperture Token]_DLT_<targetposition>
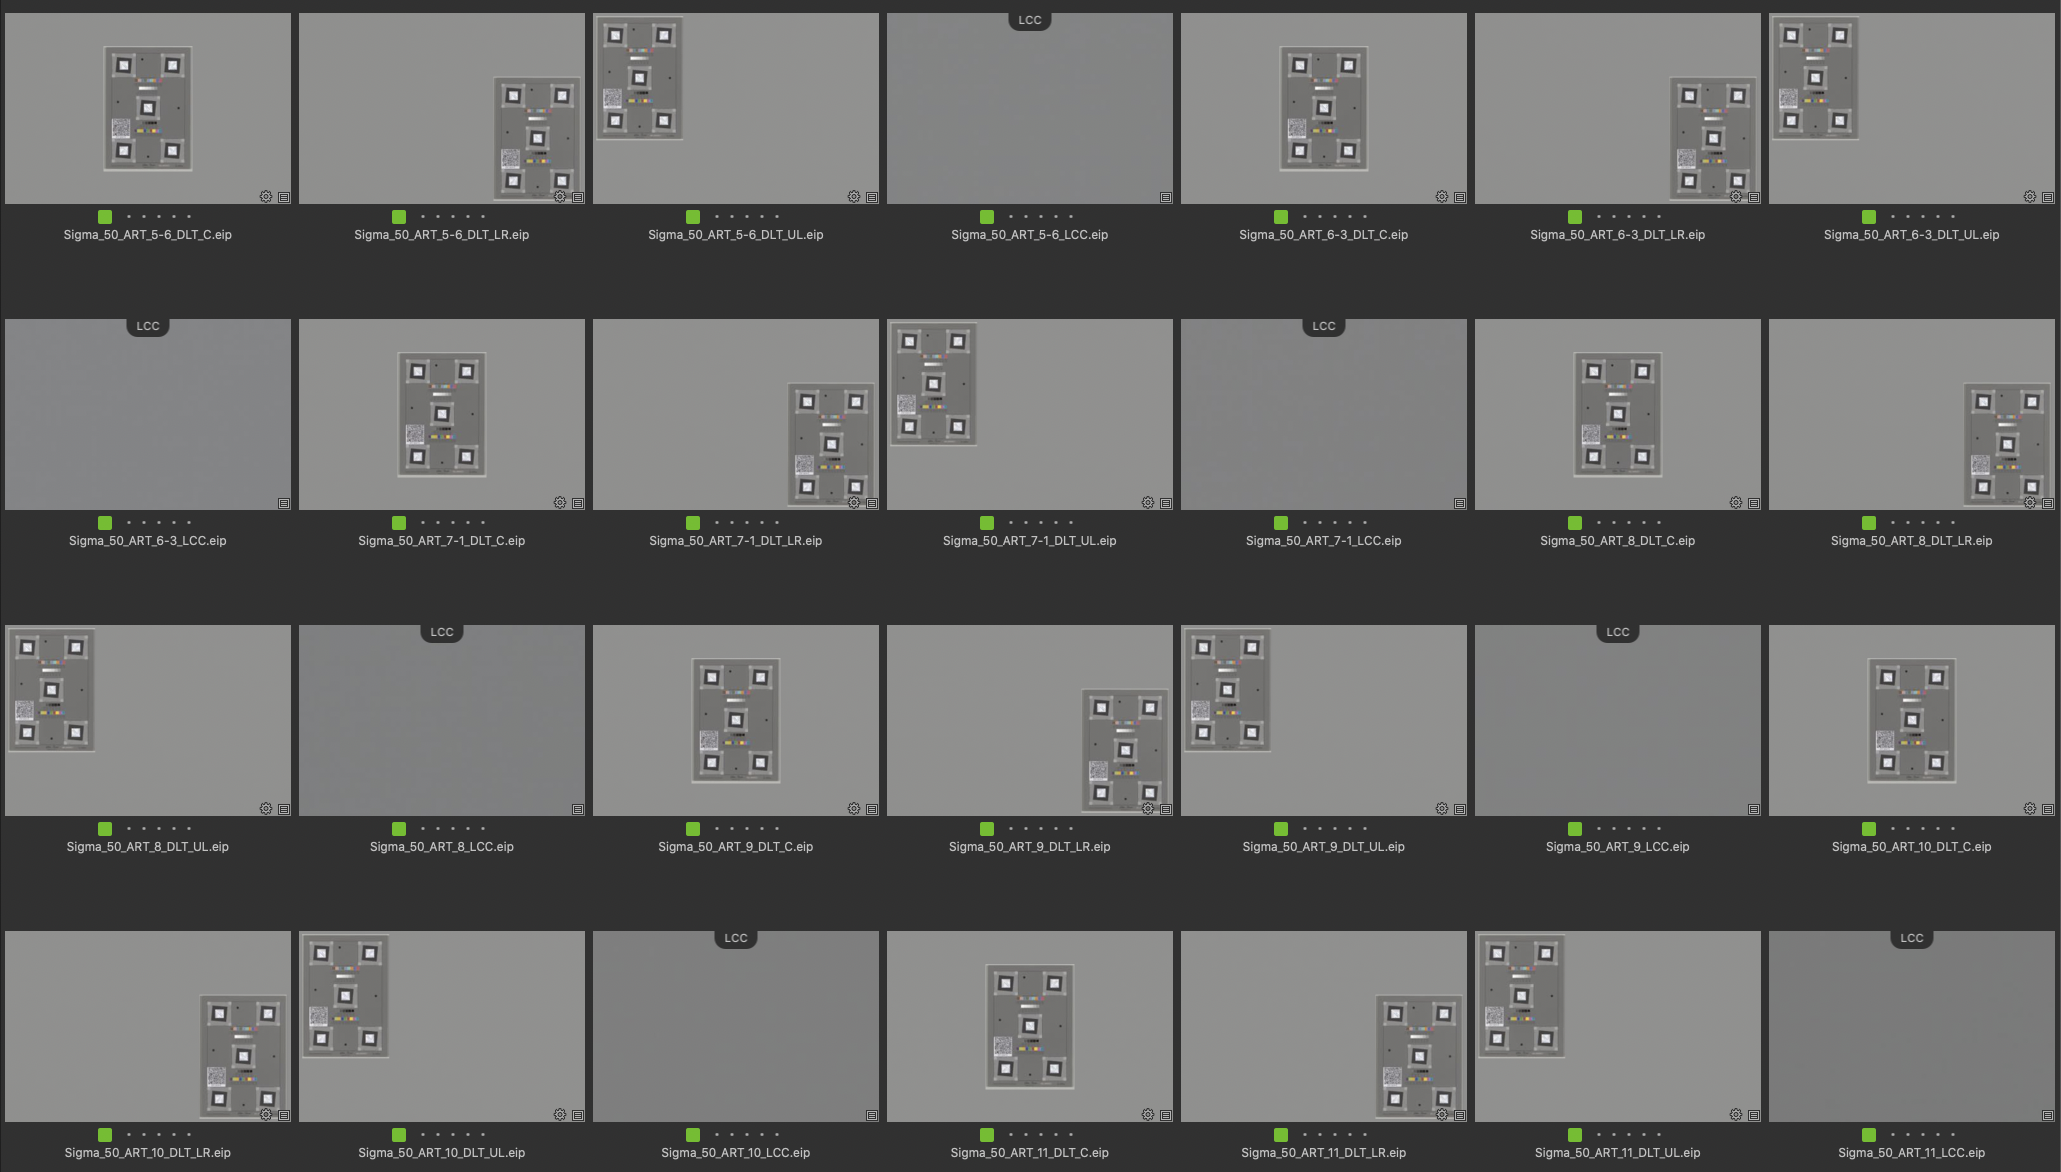
Image Quality Analysis
To measure the Sigma 50mm f/1.4 ART lens’s performance, I ran the target images through Image Science Associate’s Golden Thread NXT software which provides detailed information about the sampling efficiency, SFR 50, and SFR 10 of the imaging system for each capture. I generated 21 reports corresponding to the center, upper left, and lower right target positions for each of the seven aperture values: f/5.6, f/6.3, f/7.1, f/8, f/9, f/10, and f/11.
First, we’ll review sampling efficiency (SE) throughout the practical aperture range:


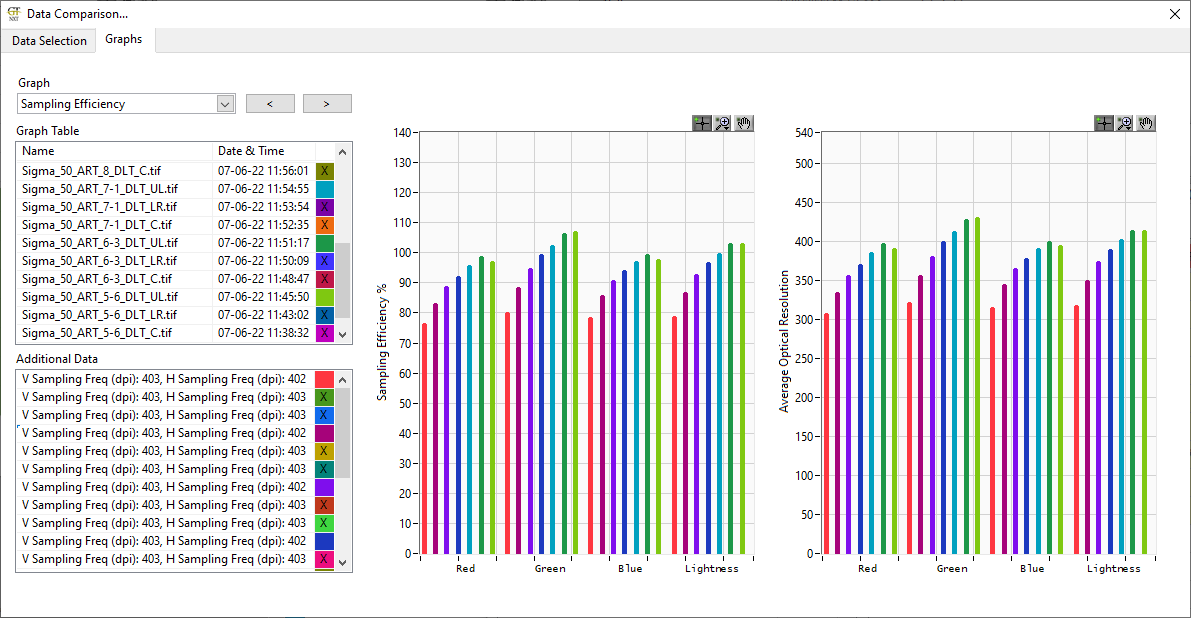
One of the many ways I determine the optimal working aperture for a lens at a given spatial resolution (400ppi) is by identifying the aperture that gives the most consistent results across the image frame. The sampling efficiency metric alone doesn’t accurately represent the performance of the lens, but it provides a good jumping off point.
I don’t necessarily want to choose an aperture based on which delivers the highest SE rates. I’m more interested in identifying an aperture that will help create the appearance of homogenous focus across the entire frame. This means I’ll more closely inspect the SFR curves of the apertures whose SE results that fluxuate the least between the center, upper left, and lower right target images while staying above 90%. I chose this number as it corresponds to the sampling efficiency threshold for FADGI 4-star performance. F/5.6 and f/6.3 will not be considered due to the nearly 20% difference between the center and outer edges. F/10 and F/11, although hinting at homogenous focus will not be considered due to SE rates below 90% (thanks for nothing, diffraction!)
This leaves f/7.1, f/8, and f/9 as the contendors.
Next, we’ll review the spatial frequency response (SFR) curves for the aperture range.


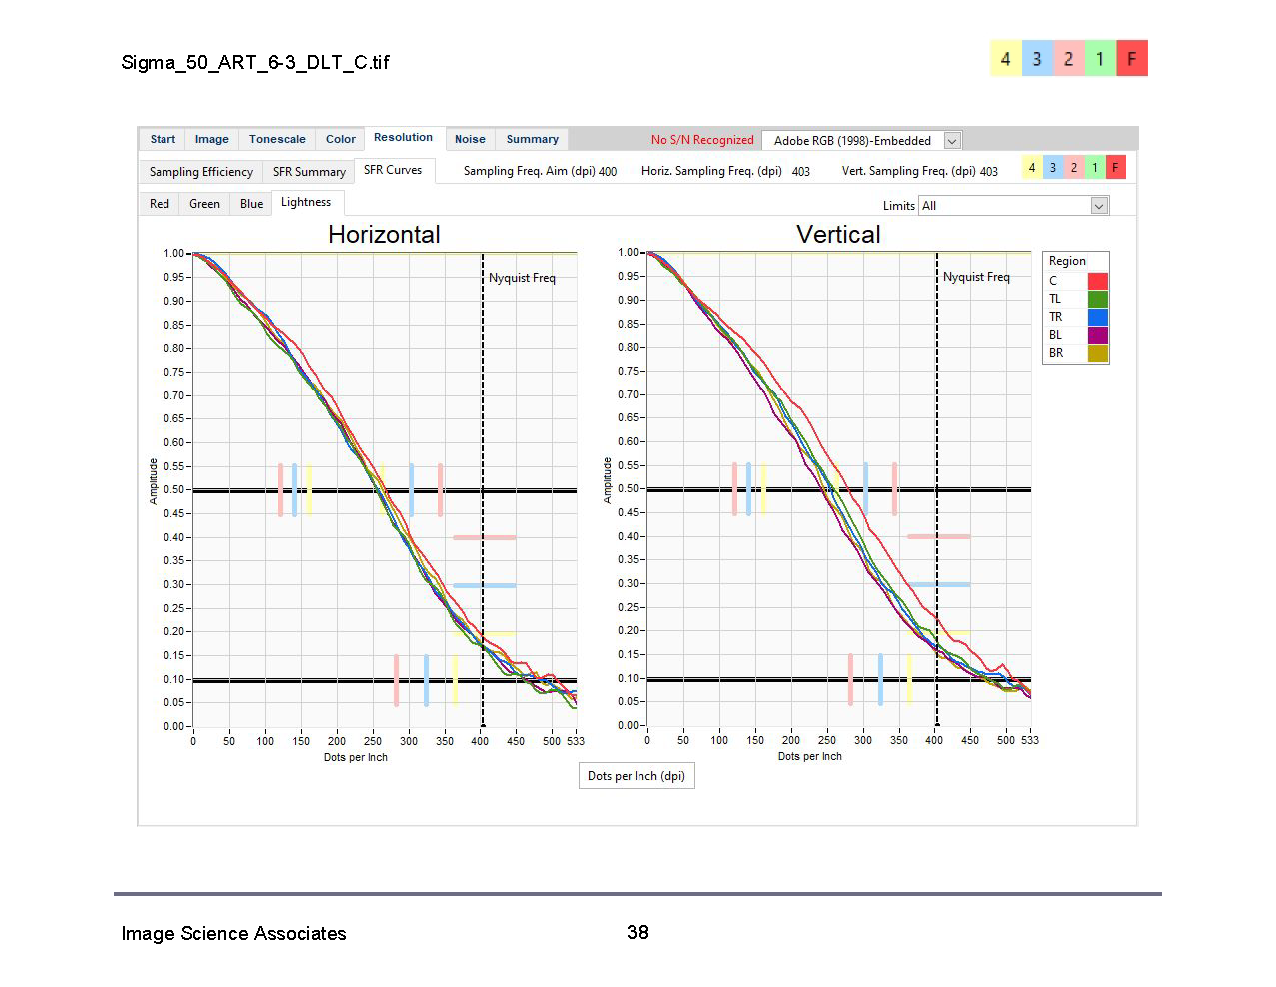


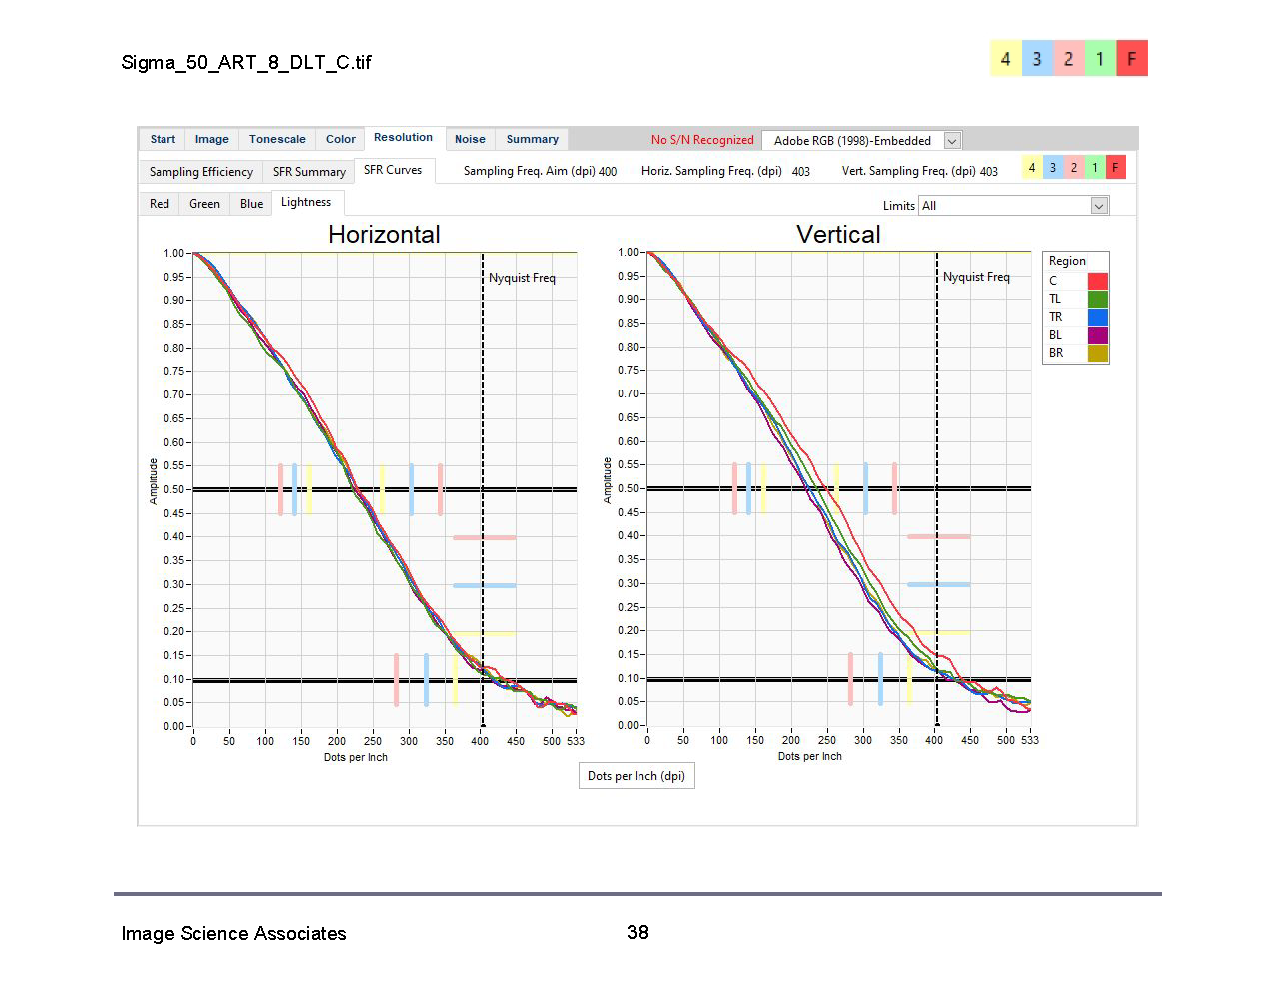


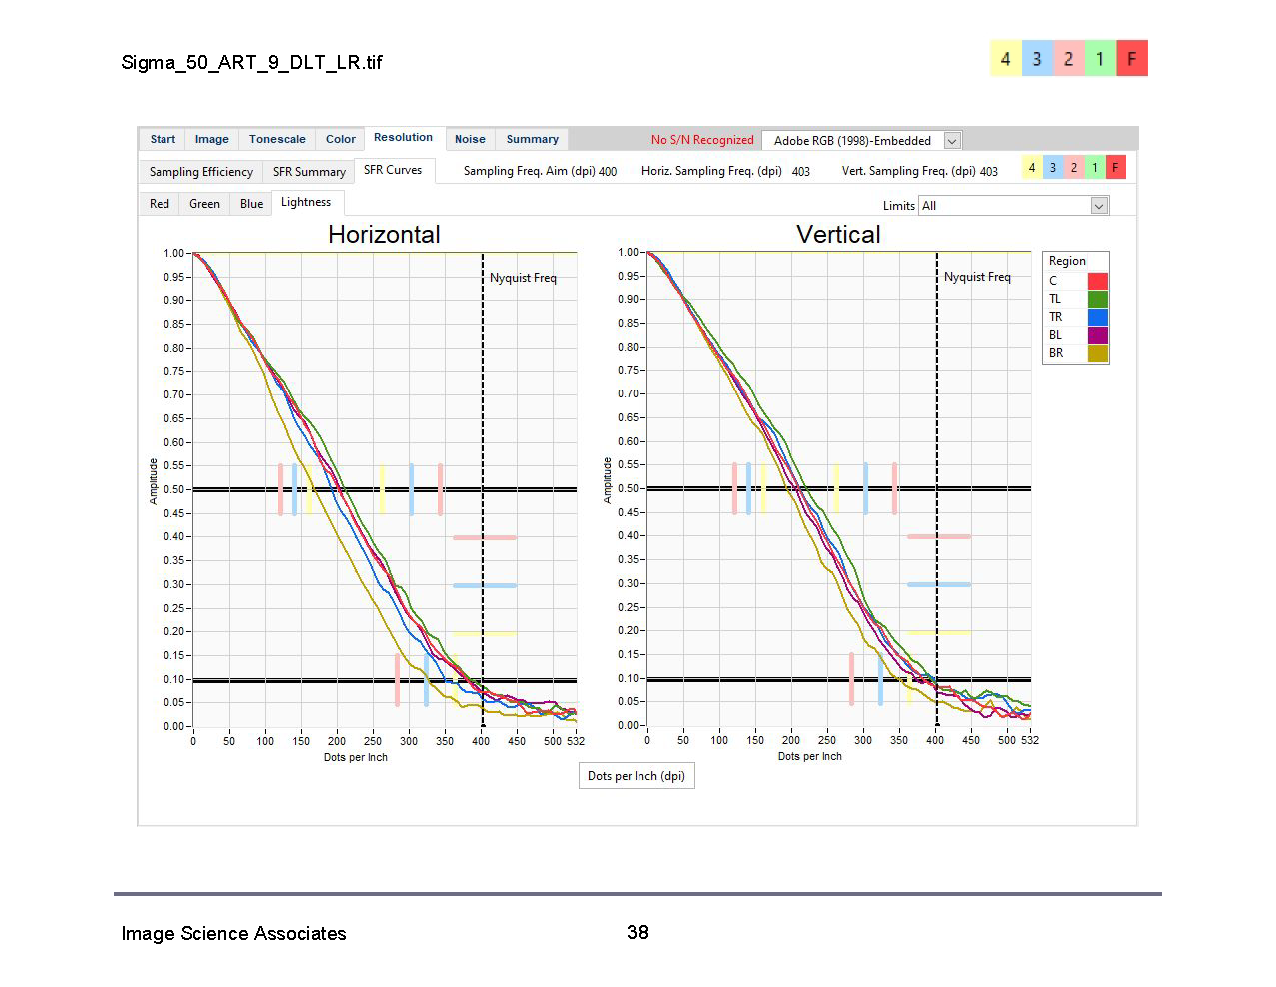


The first attribute that SFR curves allow us to evaluate is whether the image is exhibiting oversharpening or not. Oversharpening will be indicated by the graph’s Y-axis having a maximum value (MTF/SFR Max) of greater than 1.0, manifesting as halation around high-contrast details. Excessive software sharpening will also be indicated by the curves passing to the right of the vertical threshold lines at the SFR 50 amplituted (0.50 on the Y-axis). The “ideal” shape for an SFR curve for an imaging system with an optical resolution equal to sampling frequency at 400ppi would be a straight line starting at the (X, Y) coordinates (0, 1.0), passing through the yellow vertical lines (FADGI 4-star threshold) at (~200, 0.5), then intersecting with the Nyquist Frequency at (400, 0.1). Since no lens is perfect and there is some level of image processing being applied to the digital file, we instead look for a straight-ish curve with as little “S” shape as possible.
The second set of attributes the curves inform us about are whether the sensor and lens planes are parallel to the object plane and whether the plane of focus is flat or curved. When the curves for each reason are closely aligned atop one another and follow the same shape for the center-FoV target placement, this tells me that the camera is parallel to the copystand’s work surface. Many technicians will stop their evaluation here in day-to-day quality assurance workflows. By going one step further and evaluating the target at the corners/edges of the lens’s FoV, we can get a good estimate of how homogenously focused the entire image is.
Since the lens was not refocused between captures and identical sharpening was applied to each image, the result is a fair comparison of each working aperture. The goal of this test is to identify which aperture’s results shows curves for each target placement and each of the five regions that are well-aligned, have generally the same shape, and pass through the SFR 50 and SFR 10 corridors (or thresholds) at similar places.
My opinion is that between f/7.1, f/8, and f/9, f/8 provides the best balance of image across the entire frame. The SFR curves are tightly aligned for the center and upper left FoV regions, though there is a slight, but not alarming, separation of the curves for the lower right FoV region. It’s important to note that within the lower right target image, 9/10 curves pass the FADGI-4 level SFR 10 threshold. The only curve that does not is the lower right slanted-edge region on the horizontal axis, which comes in around 87.5% instead of 90%.
In other words, the most extreme corner on the lower-right side of the lens’s FoV is just 3% shy of meeting FADGI 4-star image performance—a flaw I would gladly overlook. In crucial imaging applications requiring optimal performance, I could easily avoid using 5-10% of the right side of the frame. What’s more, f/7.1, f/8, and f/9 all produce results that conform to FADGI 3-star performance.
Closing Thoughts
I would highly recommend the Sigma 50mm F1.4 ART DG HSM for cultural heritage imaging applications. With a flat plane of focus and FADGI 4-star performance across nearly the entire field of view, it is a perfect candidate for photographing collection material with exacting quality at 400ppi. For projects with less rigorous specifications, the Sigma 50 is a perfect candidate for conforming to the more practical FADGI 3-star quality for high-volume digitization projects. The homogenous focus one can achieve also makes this a perfect candidate for stitching oversized items where details need to be equally sharp when they appear in different regions of overlapping frames.
